First off, I want to thank Dickschiff, photos and directions. The directions were in German, which I translated and changed somewhat based on my own expirence and in the use of english. So the M109 in the pics are not mine.
Tools you may need.
1 - 4 mm Allen key (longer end for deeper mounted screw on the middle engine cover)
1 open end wrench 13 mm or ½ inch depending on the cable nuts
1 channel lock pliers
1 needle nose pliers
1 snips or wire cutters
String (Optional)
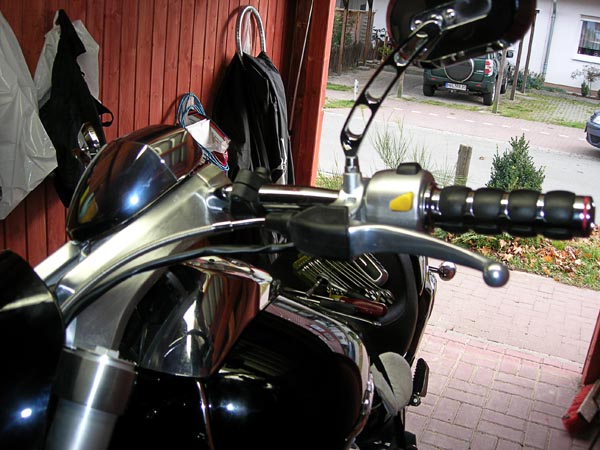
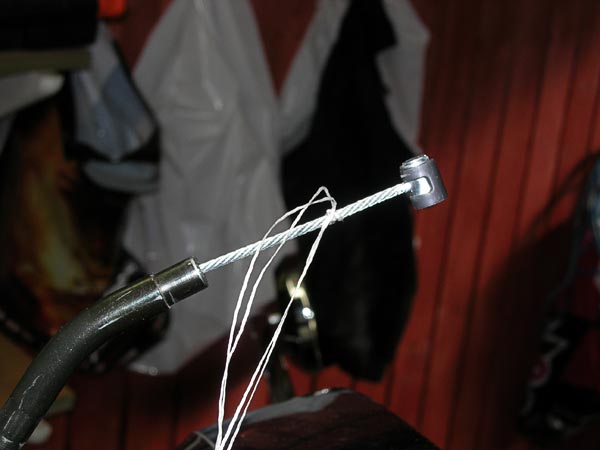
Now let's look at the cable and realize the two plastic binders connecting the old clutch cable with the electronic cables. Take the snips and cut the two parts quickly away!
![Image]()
Now we see the black rubber dust cover Suzuki added to the lever. The thing is a bit stubborn, but it is best to simply pull it backwards until it folds down and pushes away.
![Image]()
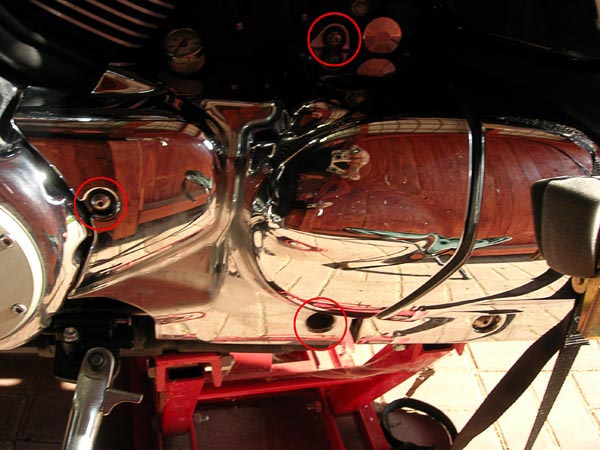
Now use the 4 mm Allen key and remove the Middle engine cover (chrome plastic) on the left. The three screws are marked here. The bottom sits slightly deeper inside, so use the longer key!
![Image]()
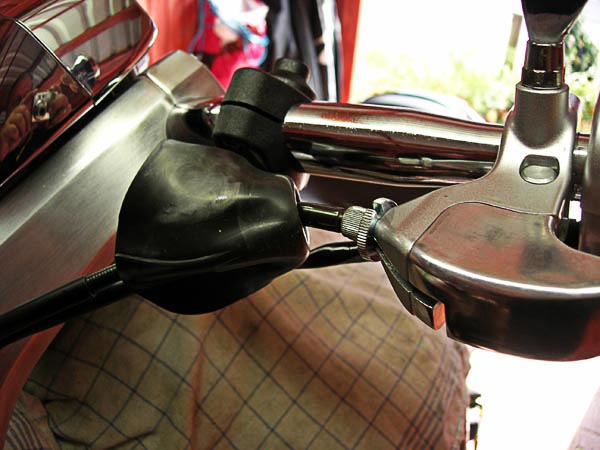
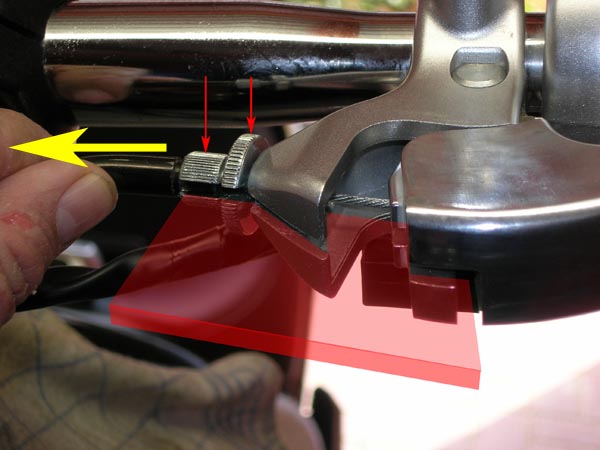
Loosen the locknut and the cable lever screw. The grooves in each should be lined up to remove the cable.
![Image]()
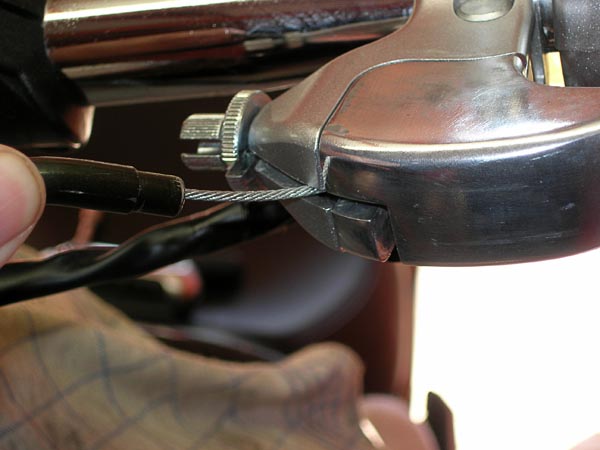
Now drag the coupling cable left and pull the cable out of the slot.
![Image]()
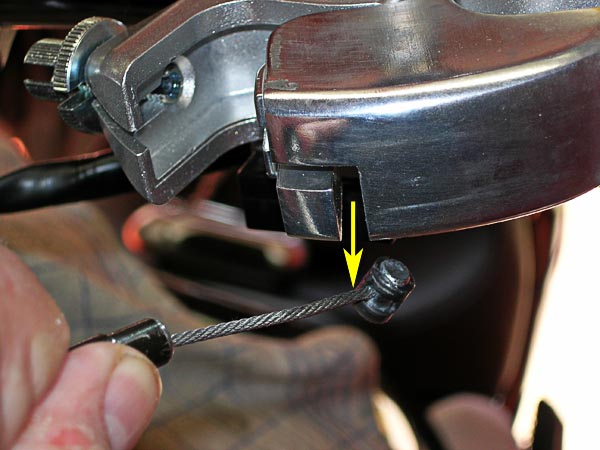
Then rotate the cable forward and push down... the cable barrel comes out below!
This reveals the cable barrel with plastic cover... which is used to probably lower friction? And allows better rotation of the cylinder in the hole? Who knows?
![Image]()
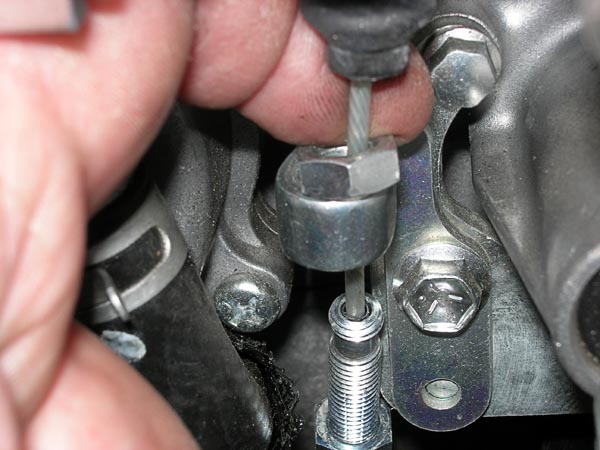
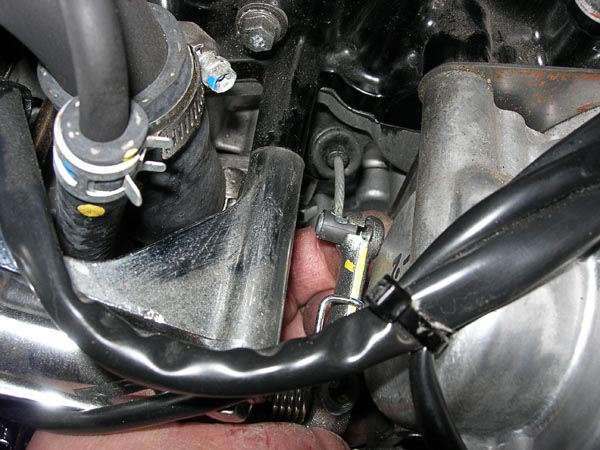
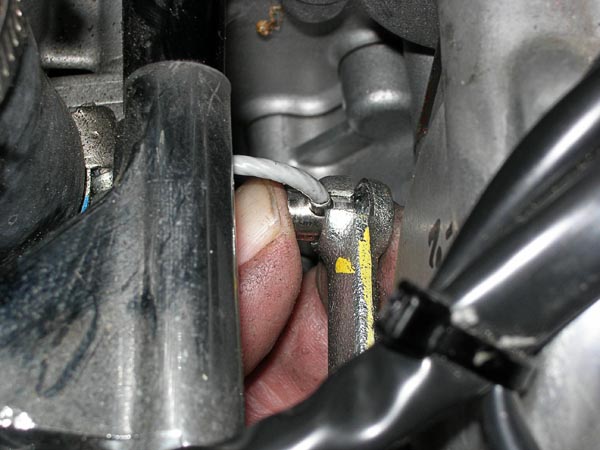
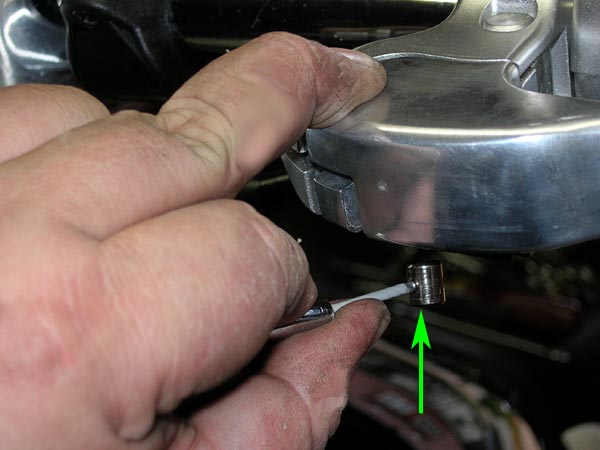
The mount on the engine is somewhat awkward. The cable runs through a tube and is then bolted to a cable bracket (looks like a hook) with two nuts. The nuts are located here in the photo below. The cable then is attached by the end barrel to the clutch lever The Coupling lever has a back off spring and is fixed with a screw. I have released the spring and lever screw so that I get more space. You can do it but it does not have to be done if you have smaller hands then I.
![Image]()
OPTIONAL
This is the mysterious fishing line. I have tied it twice around the cable so it is secure and keeps it from separating. This saves time and simplifies the routing of the new cable enormously.
![Image]()
Tie the fishing line to the top (handle) end of the old cable.
![Image]()
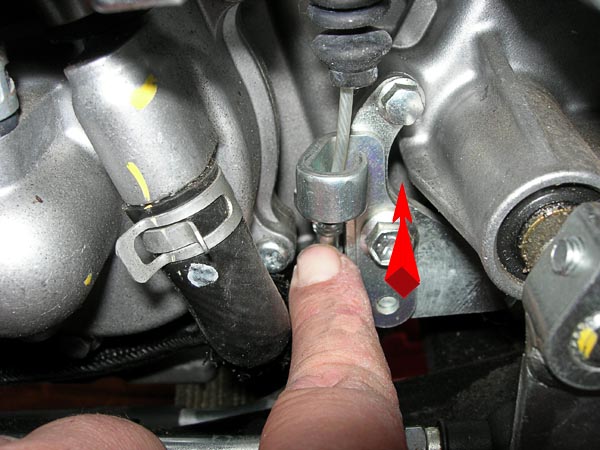
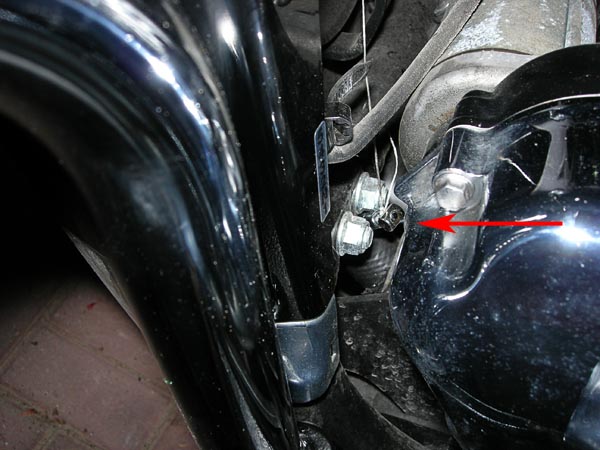
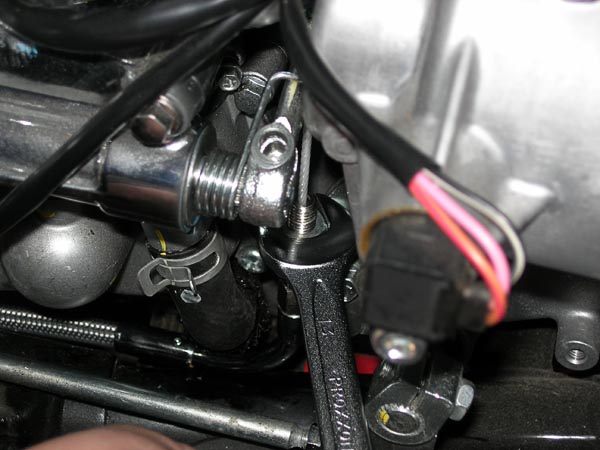
Loosen the upper fixation nut on hook which attached the curved metal portion of the clutch cable to the clutch bracket. The metal end is too thick to remove from the bracket seat, therefore press it down to get it out.
![Image]()
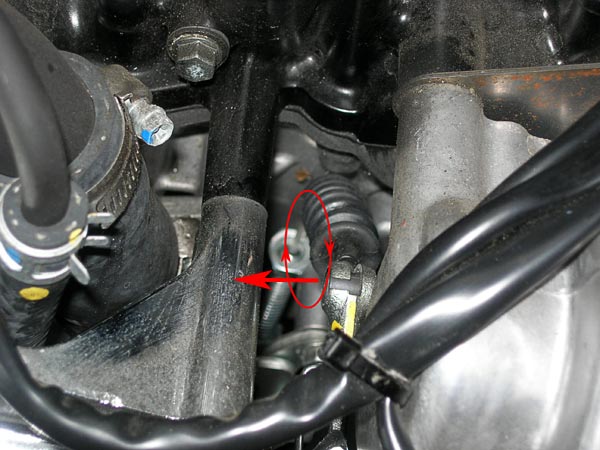
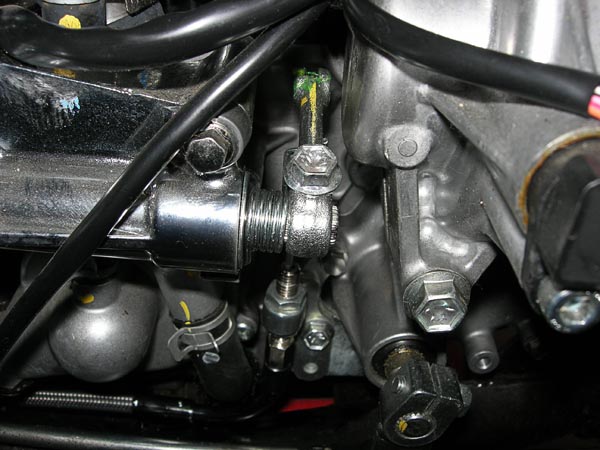
Now only the actual clutch cable is unthreaded and should be moved backward unloosening at the rear of the bracket opening.
![Image]()
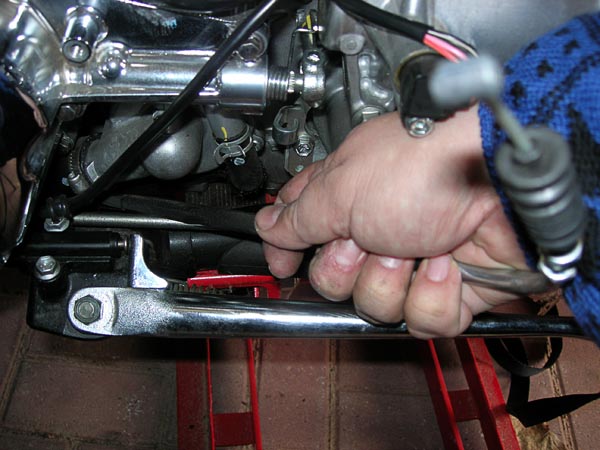
Now it is more complicated: to get the end removed from clamp's coupling lever, you rotate the cable from the bottom up and the fixation cylinder then left to move it out. It may take some jiggling of the metal portion of the clutch cable to get it to slide out smoothly.
![Image]()
This looks a lucky winner! The cable barrel is coming out!
![Image]()
The cable is now at the top and bottom free and you can pull it out carefully.
![Image]()
Pull it through calmly without jerking it because it can catch on various portions of the bike. This is where you can use the fishing line.
![Image]()
Pull the cable from the bottom upwards. The fishing line can be tied to the new cable and pulled through. Slide the cable simultaneously below. There is a motor mount where the cable must go around and it can interfere with two screws.
![Image]()
![Image]()
First mount the new cable below near the engine. Slide the clutch barrel back into place on the clutch lever. This can be tricky because the cable must be pulled up over the top of the mount before the barrel which slides into the lever. It is a good idea to add some Grease to the area that the cable barrel. For those of you using the new Barnett cable with the plastic sheath over the barrel, you may need to take a small screw driver and lightly pry the hole open a little to accommodate the clutch cable barrel.
![Image]()
Re-insert the cable behind the cable bracket and then insert the threaded metal cable slide back into the cable bin the hook of the engine and fit in the thread from below. (make sure one on the nuts is on the top of the bracket and the other below) The tighten them.
![Image]()
If you have loosened the return order spring and the clutch lever, set it in the original place and tighten the screw.
![Image]()
Near the lever be sure to slide the rubber boot back onto the cable first
![Image]()
Then fit in the barrel into the cylinder from below the clutch lever handle insuring that it is routed in the cable channel.
![Image]()
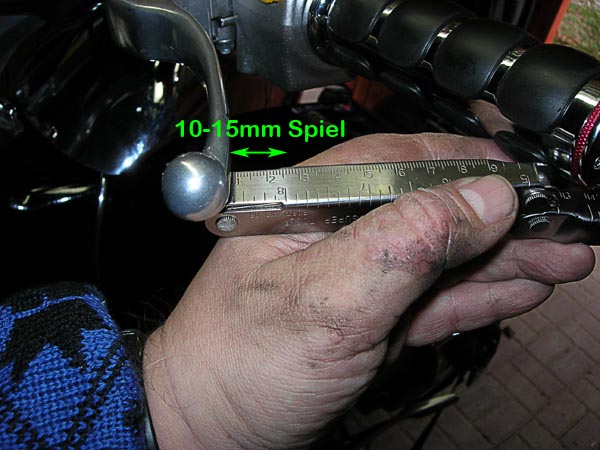
Now we adjust the Coupling play. The Coupling lever should have between 10 and 15 mm "play". Move the lever back and forth until it feels light resistance.
![Image]()
To set the cable, you need to re-thread the locknut and the cable lever screw. When the cable play is correct tighten the lock screw.
![Image]()
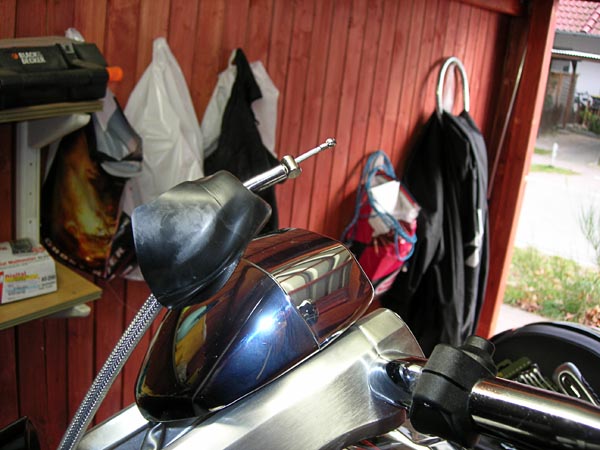
Replace the rubber dust cover and you are ready for testing.
![Image]()
Tools you may need.
1 - 4 mm Allen key (longer end for deeper mounted screw on the middle engine cover)
1 open end wrench 13 mm or ½ inch depending on the cable nuts
1 channel lock pliers
1 needle nose pliers
1 snips or wire cutters
String (Optional)
Now let's look at the cable and realize the two plastic binders connecting the old clutch cable with the electronic cables. Take the snips and cut the two parts quickly away!
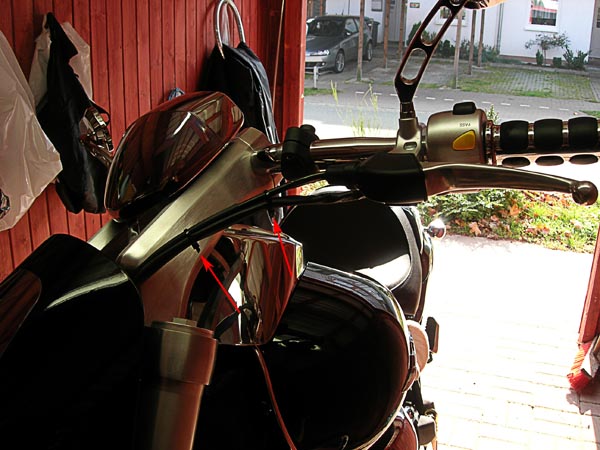
Now we see the black rubber dust cover Suzuki added to the lever. The thing is a bit stubborn, but it is best to simply pull it backwards until it folds down and pushes away.
Now use the 4 mm Allen key and remove the Middle engine cover (chrome plastic) on the left. The three screws are marked here. The bottom sits slightly deeper inside, so use the longer key!
Loosen the locknut and the cable lever screw. The grooves in each should be lined up to remove the cable.
Now drag the coupling cable left and pull the cable out of the slot.
Then rotate the cable forward and push down... the cable barrel comes out below!
This reveals the cable barrel with plastic cover... which is used to probably lower friction? And allows better rotation of the cylinder in the hole? Who knows?
The mount on the engine is somewhat awkward. The cable runs through a tube and is then bolted to a cable bracket (looks like a hook) with two nuts. The nuts are located here in the photo below. The cable then is attached by the end barrel to the clutch lever The Coupling lever has a back off spring and is fixed with a screw. I have released the spring and lever screw so that I get more space. You can do it but it does not have to be done if you have smaller hands then I.

OPTIONAL
This is the mysterious fishing line. I have tied it twice around the cable so it is secure and keeps it from separating. This saves time and simplifies the routing of the new cable enormously.
Tie the fishing line to the top (handle) end of the old cable.
Loosen the upper fixation nut on hook which attached the curved metal portion of the clutch cable to the clutch bracket. The metal end is too thick to remove from the bracket seat, therefore press it down to get it out.
Now only the actual clutch cable is unthreaded and should be moved backward unloosening at the rear of the bracket opening.
Now it is more complicated: to get the end removed from clamp's coupling lever, you rotate the cable from the bottom up and the fixation cylinder then left to move it out. It may take some jiggling of the metal portion of the clutch cable to get it to slide out smoothly.
This looks a lucky winner! The cable barrel is coming out!
The cable is now at the top and bottom free and you can pull it out carefully.
Pull it through calmly without jerking it because it can catch on various portions of the bike. This is where you can use the fishing line.

Pull the cable from the bottom upwards. The fishing line can be tied to the new cable and pulled through. Slide the cable simultaneously below. There is a motor mount where the cable must go around and it can interfere with two screws.
First mount the new cable below near the engine. Slide the clutch barrel back into place on the clutch lever. This can be tricky because the cable must be pulled up over the top of the mount before the barrel which slides into the lever. It is a good idea to add some Grease to the area that the cable barrel. For those of you using the new Barnett cable with the plastic sheath over the barrel, you may need to take a small screw driver and lightly pry the hole open a little to accommodate the clutch cable barrel.
Re-insert the cable behind the cable bracket and then insert the threaded metal cable slide back into the cable bin the hook of the engine and fit in the thread from below. (make sure one on the nuts is on the top of the bracket and the other below) The tighten them.
If you have loosened the return order spring and the clutch lever, set it in the original place and tighten the screw.
Near the lever be sure to slide the rubber boot back onto the cable first
Then fit in the barrel into the cylinder from below the clutch lever handle insuring that it is routed in the cable channel.
Now we adjust the Coupling play. The Coupling lever should have between 10 and 15 mm "play". Move the lever back and forth until it feels light resistance.
To set the cable, you need to re-thread the locknut and the cable lever screw. When the cable play is correct tighten the lock screw.
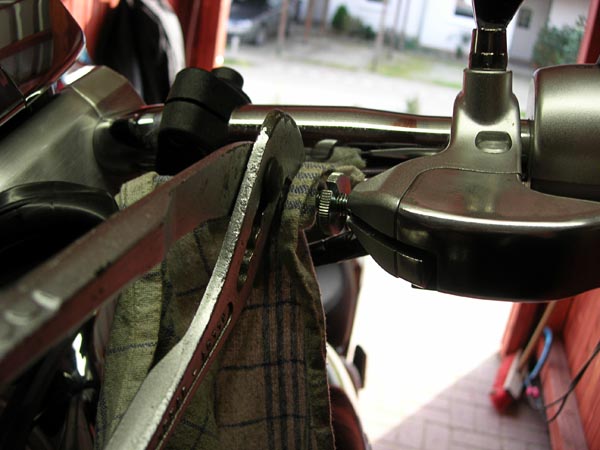
Replace the rubber dust cover and you are ready for testing.